
Groups
Overview
In Pay-i, Groups are a key component of the organizational structure, sitting between Organizations and Applications. Groups organize your Applications and provide aggregated metrics across them. When you first access Pay-i, you'll notice the dashboard is organized around the concept of Groups, with several key areas dedicated to group management and navigation.
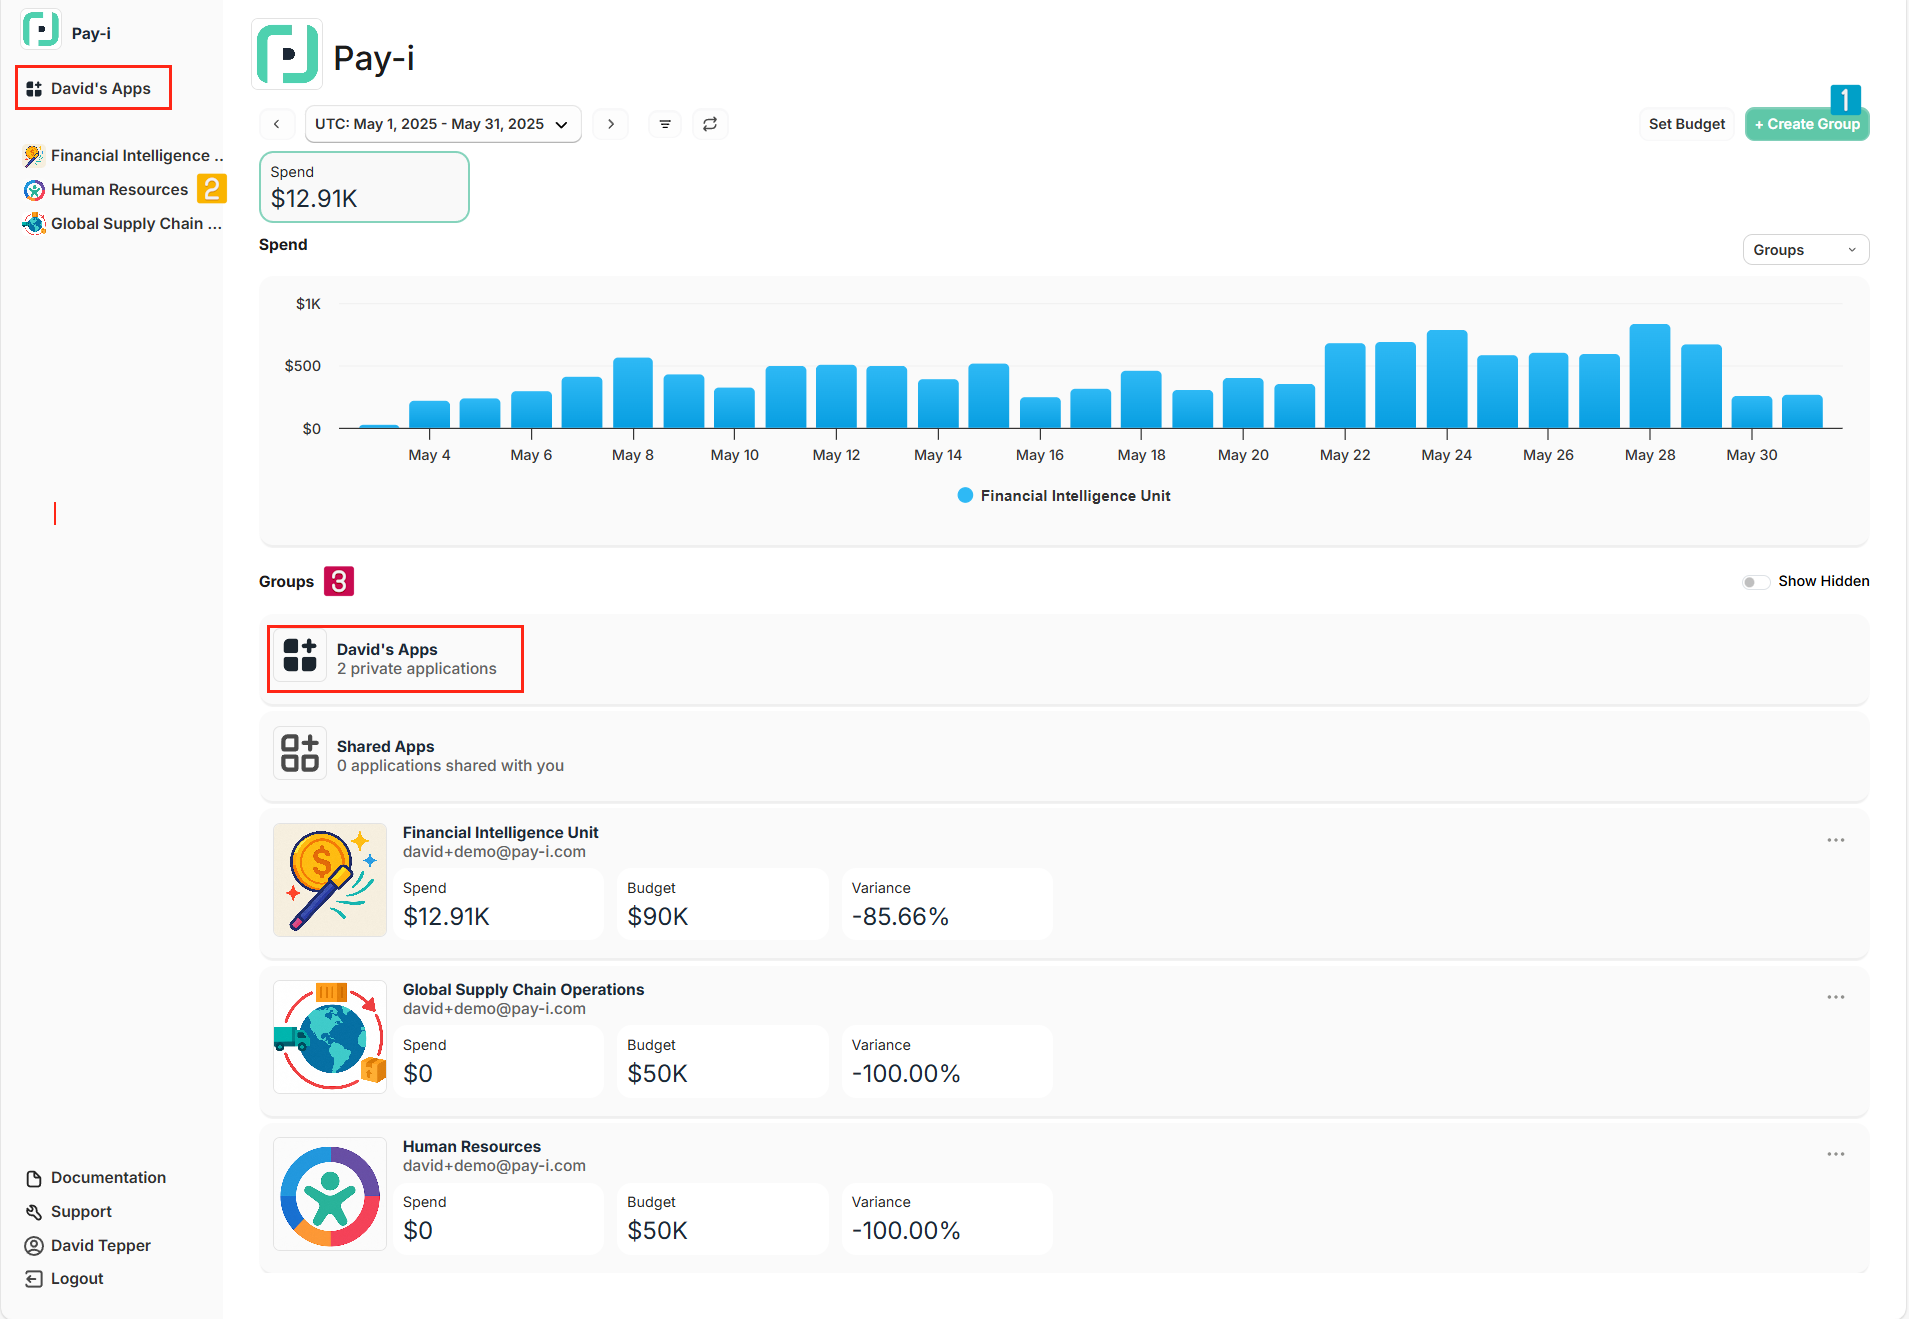
Pay-i dashboard showing (1) Create Group button, (2) Group navigation in left sidebar, (3) Groups section with metrics and the personal group with private apps.
Understanding Groups
Every user automatically receives a personal group for private applications when they join Pay-i (like "David's Apps" in the image). This personal group is visible only to you and cannot be shared with others, though Applications within it can be individually shared. While sufficient for individual use, you'll need to create shared groups to collaborate with team members.
Groups help you organize applications logically and provide aggregated metrics across all applications within them, giving you a higher-level view of your AI usage.
Creating Groups
You can create a new shared group by clicking the "+ Create Group" button in the top-right corner.
You'll want to create additional shared groups when:
- You need to collaborate with team members on multiple applications
- You want to organize applications by department, project, or function
To create a new group:
- Click the "+ Create Group" button (Area 1 in the screenshot above)
- Enter a name for your group in the dialog that appears
- Configure any additional settings
- Click "Create" to finish
Shared Apps
If an application is in a group that you are not a member of, and that application is shared with you, then it will appear in the Shared Apps section.